From the hand of two ice cream masters with as long a professional career as Pablo Galiana and Enrique Coloma, we undertake an extensive tour of ice cream making. In this itinerary they pour out their solid training to explain the most important elements of each stage in a simple way. It will reviewed the heavy, the mixture of ingredients, the pasteurization, the homogenization, the maturation, the maintenance and its commercialization through the packaging.

1. Weighing
This is the first step. All the ingredients must be weighed before being placed in the pasteurizer so as to make sure no ingredient has been omitted or accidentally added twice. Another option, somewhat less safe, would be to follow the order of ingredients in the formula.
Weighing is a rigorous phase to some extent – overweighing 5 to 10 grams of an ingredient of which 10 kg is to be added is an acceptable error. In this case, the manufacturer is the person who should finally decide by using common sense.
All those ingredients in a smaller amount –such as stabilizers, emulsifiers, proteins, aromas or colorings– must be scrupulously weighed using a precision scale, especially if small amounts are needed (< 50 grams).
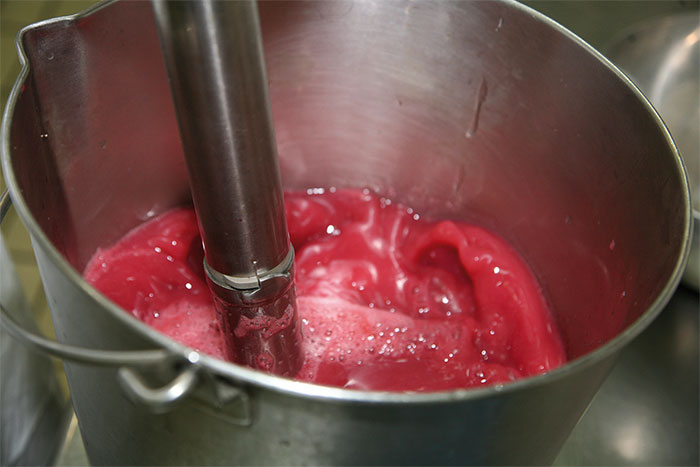
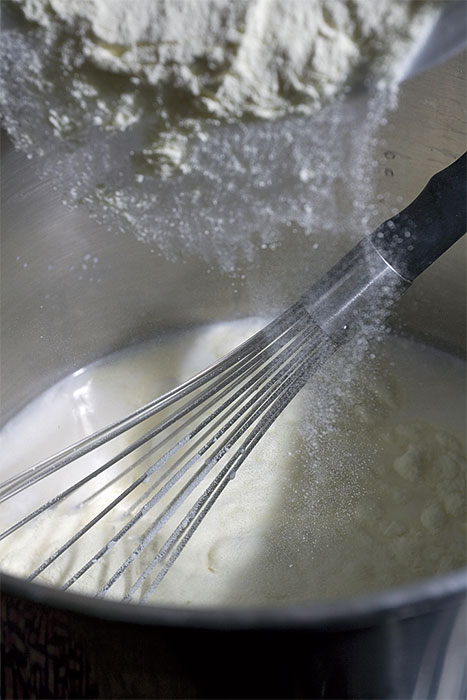
2. Mixing of ingredients
Mixing or dissolving some ingredients is the second step in the preparation of ice cream.
This is normally carried out in a pasteurizer. The liquid ingredients, milk or water are introduced first, then the cream (there are different opinions regarding this last point – some artisans introduce it at 70ºC and others when the temperature starts to descend).
At about 30ºC, we can start mixing in the milk powder as well as the powdered sugars, setting the beater on the highest speed. Following this, the stabilizer-emulsifier is introduced, previously mixed with part of the sucrose. By doing this, we prevent the stabilizer from forming lumps and we ensure a proper dissolution. At approximately 60ºC-70ºC, the liquid glucose syrups are added, as well as the chocolate couvertures, cocoa, nut paste…
When infusing vanilla or cinnamon, these should be placed in a bean-holder inside the pasteurizer, or otherwise make a separate infusion in some of the water or milk. Sometimes it is interesting to bring the infusion to the boiling point so as to take a greater advantage of the species. For this reason, I suggest doing it out of the pasteurizer, as this never reaches 100ºC.
Some ingredients need no pasteurization, either due to their low ph –which might result in the coagulation of the milk proteins– or because it is not interesting from an organoleptic point of view and we know for certain that the product poses no risk at all.
For example: let’s imagine we want to introduce some jam into an ice cream. If this jam has been purchased in a store, it will surely have been pasteurized with an autoclave. If this is the case, pasteurization is not needed. Normally, all those products with low water content (such as pralinés or nut pastes) need no pasteurization, as well as products with low acidity and high sugar content.
3. Pasteurization
Pasteurization is a food stabilization process which pursues the reduction of the population of microorganisms found in food so as to prolong its lifespan. Through pasteurization it is possible to reduce the number of microorganisms by means of a sudden increase of the temperature for a specific time, which involves the application of heat.
Pasteurization is a mild heat treatment, unlike sterilization, which is rather intense. In pasteurization, relatively low temperatures and short time periods are used, and thus a moderately longer lifespan is obtained; at the same time, the nutritional value and organoleptic qualities are preserved.
However, despite being a mild treatment, pasteurization eliminates the pathogenic microorganisms, although the number of altering microorganisms is only reduced.
 Pasteurization has different objectives according to the type of food it is applied to. When applied to acidic food, such us fruit juices, a good stabilization is obtained, because an acidic environment impedes the proliferation of sporulated microorganisms, which are the most resistant to heat, and the food properties are preserved.
In the case of hardly acidic food, such as milk, the destruction of pathogenic flora and the reduction of the benign one is achieved through pasteurization, thus resulting in a short-lifespan product which needs to be stored in refrigeration but with some characteristics similar to those of raw milk. As far as milk is concerned, the most relevant pathogens likely to be present in it are the Koch bacillus (tuberculosis), salmonella typhi and paratyphi (typhus), Brucella melitensis (Malta fever) and streptococcus (meningitis). Most of these germs do not make any alterations to the milk, and their existence may therefore go unnoticed.
However, all these pathogens can be destroyed with a mild heat treatment which results in a more hygienic product that will go off by the action of benign flora (lactobacilli) before becoming a hazard to health.
“Pasteurization employs relatively low temperatures and contact times, achieving a moderate prolongation of the ice cream’s shelf life”
The temperatures during the pasteurization process, as said above, are mild, always below 100ºC. For example, in the case of liquid foods in bulk it would be 72ºC to 85ºC and short time periods (15 to 20 seconds). In the case of packed foods, the temperature should be 62ºC to 68ºC with longer time periods, approximately 30 minutes. As this is a mild heat treatment, resulting organoleptic alterations or nutritional changes are almost irrelevant.
4. Homogenization
The homogenization process consists of finely dividing the fat globules in the mixture. Non-homogenized milk fat can easily be observed through a microscope. In those conditions, the globules can be as big as 20 microns in diameter. Thanks to a natural substance existing in milk (agglutinin) these globules gather together forming clusters. Due to their low density compared to that of milk serum, and by action of the force of gravity, they ascend and form a ‘milk skin’. In order to prevent that ‘defect’, the fat is subjected, together with the rest of the mix, to the so-called homogenization process.
Generally, in artisanal ice cream making, homogenizers are not used, as the amount of air and fat incorporated to the ice cream are small compared to that of larger manufacturers.
5. Maturing
It consists of storing the mix for the ice cream in a cold place, between 2ºC and 5ºC, for a specific time, so that it sits and some ingredients are properly hydrated.
A slow agitation, at intervals, should be applied so as to prevent the solid elements from settling on the bottom. The maturing process should not last longer than 72 hours. It is normally carried out in the pasteurizer itself or in a maturing vat.
And here is the eternal dilemma: is maturing really necessary? In my opinion, it is. This process must be carried out to allow the proteins to hydrate as much as possible. Also to help the stabilizers work properly. I believe that the mix should mature for at least 4 hours from the moment it reaches 2ºC after pasteurization. Ideally, it should mature 8 to 10 hours.
What happens if maturing is omitted?
If the ice cream is to be consumed within a short time, we pasteurize and then cream, pass through the blast freezer and finally transfer to the display cabinet.
If the consumption is within one or two days, the result will be a freshly made ice cream, without time for any trouble…
If the maturing process is omitted, it will result in a higher amount of free water, which will eventually crystallize and may become ice crystals perceptible in the ice cream. It is also possible that the stabilizer has not dissolved properly and therefore some small lumps may appear in the ice cream. And as the stabilizer has not hydrated long enough, the ice cream may melt more rapidly.
If milk powder has been used, it may not have dissolved properly and the ice cream may be colder.
6. Creaming
During this process, the originally liquid texture becomes solid or semi-solid by means of agitation and refrigeration.
The ice cream mix is placed in a creaming machine (ice cream machine). This normally consists of a cylindrical tube which produces cold on its sides (-35ºC) and some beaters which run along this cylinder, helping the mix acquire the shape of ice cream (the water freezes).
During this process, air is also incorporated thanks to the agitation of the beaters of the machine. The amount of air incorporated depends on many factors, such as the amount of 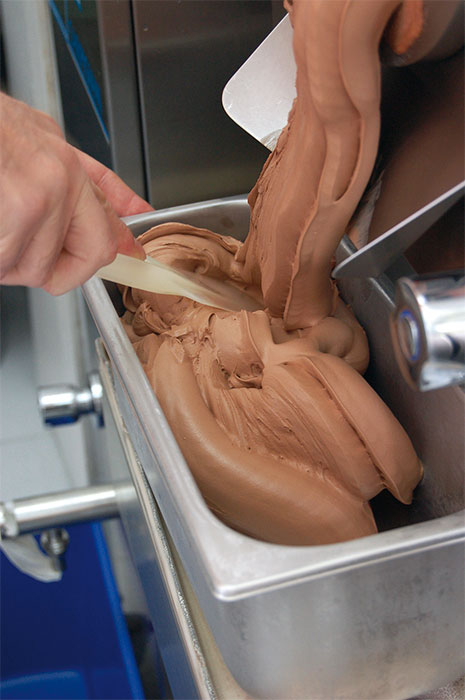 proteins, total solids, type of carbohydrates used, use of emulsifiers… If an excess air is incorporated, the resulting ice cream will resemble a mousse. On the contrary, if too little air is incorporated the resulting ice cream will be heavy and too thick. In artisanal ice cream making, a ‘normal’ amount of air would be 25-35%.
For example: If we pasteurize a 50 kg ice cream mix, and 30% air is added to it, we will obtain approximately 65 liters. This way, a 5 liter bowl will weigh 3.845 kg and one liter 0.769 kg.
The creaming process lasts for 8 to 12 minutes, and afterwards the ice cream can be extracted.
During this phase, as well as during the upcoming ones, extreme measures regarding hygiene must be taken. We must check that the ice cream machine works properly; otherwise the resulting quality of the ice cream would be compromised. When extracted from the ice cream machine, the ice cream should have a temperature of -8ºC to -12ºC.
7. Packaging
We should use disinfected ice cream pans or containers suitable for foodstuffs.
Ice cream should be covered with plastic wrap or a lid to prevent it from being in contact with air. This is an important measure, as ice cream can easily ‘absorb’ odors if uncovered…
If placed in a blast chiller or ventilated refrigerator, air will start drying the ice cream excessively, and we do not want that to happen…
8. Blast Freezing
When packaged, it should be transferred to the blast freezer so that its temperature goes down to at least -22ºC as quickly as possible. A chest freezer at a very low temperature (about -30ºC), partially full only and not often opened is also suitable.
With this deep-freezing process, the water which the ice cream contains freezes in the shape of very small crystals, unnoticeable when tasted.
“During the whipping phase, air is incorporated into the ice cream due to the agitation of the blender blades”
9. Storage
Ice cream should be stored and preserved at a temperature below -18ºC. In my opinion, this is a preservation temperature only suitable for a few days. At this temperature, there is a high risk of crystallization of water. In order to store the ice cream for a longer period of time without this having an effect on the structure, we should store it at approximately -24ºC.
10. Transportation
The transportation of ice cream, being this a frozen product, should be carried out while always guaranteeing a stable temperature. A sudden drop of the temperature would make the product useless, as it would be subjected to defrosting and eventual re-freezing when reaching its destination and this would result into the creation of large ice crystals, as well as other microbiological problems.
The best advice I can give if this ever happened is the discard of the product.
For long distances, it is essential to have a refrigerated van which ensures a temperature of at least -18ºC. For short distances, an insulated van or an insulated container can be useful.
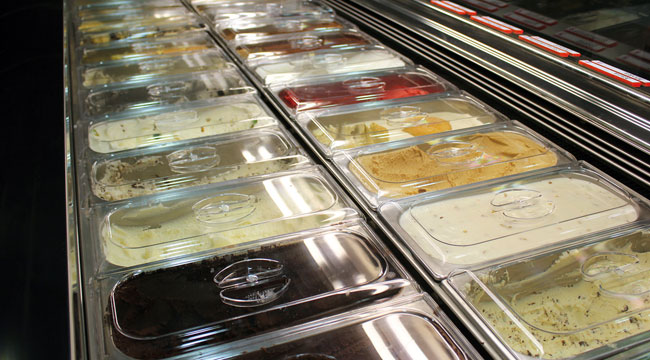
11. Display
Ice creams conceived for their sale in ice cream display cabinets normally have an AFP of -11ºC, as this is the temperature on the surface of the pans. We must adjust the temperature of the cabinet to obtain that temperature for the sale.
Display cabinets are not actually the best friends for our ice cream, as they are not the best place to store it. They get dirty easily and must be cleaned on a daily basis, which forces us to remove the ice cream from the cabinet for its cleaning. The ice cream should be then transferred to a freezer at an approximate temperature of -15ºC. This way we will prevent the water defrosted in the pans at -11ºC from freezing and forming ice chunks in the ice cream.
Inevitably, any ice cream displayed in a cabinet will lose its properties with the pass of time.